How do you cover a boat with T-top?
Boats are a great asset for anyone who loves the water, whether it’s for fishing, cruising, or just enjoying the outdoors. However, owning a boat comes with its own set of challenges and responsibilities. One of these is protecting your boat from the elements when it’s not in use. A T-top is an excellent option for providing shade and shelter to your boat.
A T-top Boat Covers is a type of roof structure that sits on top of the center console of a boat. It provides shade and protection from rain and sun while also acting as a mounting point for electronics like radar and speakers. However, covering your entire boat with a T-top can be tricky if you’re not familiar with how to do it properly.
Boat T-tops: A Game Changer for Owners
Boat T-tops have quickly become a game changer for boat owners, providing the perfect combination of shade and protection from the sun’s harmful UV rays. When it comes to covering a boat with T-top, the process is relatively simple and straightforward. A T-top is essentially a metal frame that is bolted to the top of your boat’s console or center console, creating a canopy-like structure that provides ample shade.

The next step in the process of covering your boat with a T-top involves choosing the right fabric for your needs. There are many different types of fabrics available on the market today, ranging from lightweight materials like polyester to heavy-duty vinyl options that provide maximum protection against harsh weather conditions. Once you’ve chosen your fabric, it’s time to enlist the help of an experienced professional who can install your new T-top onto your boat.
Overall, adding a T-top to your boat can provide numerous benefits and make all of your future boating adventures more enjoyable. Whether you’re looking for shade on hot summer days or protection from wind and rain while out on the water, investing in this type of upgrade is sure to pay off in spades over time.
Understanding Boat T-tops
When it comes to boat T-tops, the question of how to cover them can be a bit tricky. A properly fitted cover will not only protect your investment from the elements but also extend its lifespan. The first decision you’ll need to make is whether you want a custom or universal fit cover. Custom covers are tailored to fit your specific boat and T-top while universal covers come in standard sizes that can be adjusted for a relatively secure fit.

Once you’ve decided on the type of cover, it’s time to consider the material. Boat covers come in various materials such as polyester, canvas, and vinyl with different levels of durability and weather resistance. Polyester has excellent UV protection and water repellency but may not hold up as well against strong winds or heavy rain compared to canvas or vinyl.
It’s important to note that covering your boat with a T-top can be challenging due to its unique shape. Some companies offer T-top extensions that attach onto the existing framework providing additional overhead coverage which makes fitting a standard cover much easier. With careful consideration of size, material, and potential modifications like T-top extensions, protecting your boat from the elements doesn’t have to be difficult with a little planning ahead.
Preparing the Boat for T-top Installation
First, prepare the boat for T-top installation by removing any existing covers or bimini tops. This will allow for a clear workspace and ensure an accurate measurement of the area where the T-top will be installed. It is important to measure carefully to ensure that the T-top fits snugly on the boat.
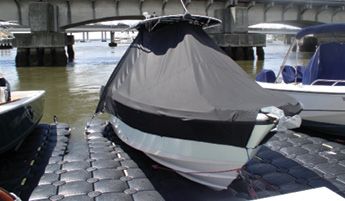
Next, clean the area where the T-top will be installed thoroughly. This includes wiping down any debris or dirt on both sides of the mounting location with a cleaning solution and allowing it to dry completely. A clean surface ensures proper adhesion of mounting hardware.
Finally, assemble all necessary tools and materials before beginning installation. These may include screws, bolts, sealant, drill bits and a drill driver or wrenches depending on your particular boat’s requirements, ensuring you have everything you need before starting can help prevent delays or errors during installation.
By following these simple steps to prepare your boat for T-top installation, you can set yourself up for success in adding this valuable accessory that can transform your boating experience by providing additional shade and protection from harsh sun rays while out on the water.
Installing the T-top on Your Boat
The process of installing a T-top on your boat might seem intimidating at first, but with the right tools and guidance, it can be quite simple. The first step is to determine the right size and style of T-top for your boat. Once you have selected the appropriate T-top, you should ensure that all necessary hardware is included in the package.
After gathering all required materials, begin by assembling the frame of your T-top. It’s crucial to follow manufacturer instructions carefully and double-check all connections before proceeding. With a helper or two, gently lift the assembled T-top into position on top of your boat’s center console or other mounting location.
Next, secure your T-top frame to your boat using bolts and screws from your hardware kit. You may need to drill holes in some cases; however, this will vary based on the type of mounting system used. Finally, attach any desired accessories such as lights or rod holders according to their manufacturer instructions. With these steps completed correctly, you’ll have successfully installed a new T-Top onto your beloved vessel!
Maintaining Your Boat T-top
A boat T-top can provide a great deal of shade and protection from the elements while out on the water. However, it’s important to properly maintain your T-top to ensure its longevity and effectiveness. One important aspect of maintenance is covering your T-top when not in use.
When covering your T-top, be sure to choose a cover that fits securely and snugly over the top, while still allowing for proper ventilation. A poorly fitting cover can cause damage to both the T-top and the material of the cover itself. Additionally, make sure to clean and dry the T-top thoroughly before covering it to prevent any mold or mildew growth.
It’s also important to regularly inspect your T-top for any signs of wear or damage, such as loose screws or cracks in the frame. Addressing these issues promptly can prevent further damage and extend the life of your T-top. By following these simple steps, you can help ensure that your boat’s T-top stays in top shape for years to come.
Covering Your Boat with a T-top: Tips and Tricks
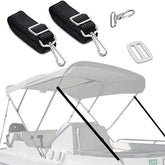
Covering your boat with a T-top can be an excellent investment to protect you and your passengers from the sun and rain while on the water. To make sure that your T-top cover lasts as long as possible, it is important to properly secure it. One tip for securing your boat cover is to use bungee cords or ropes instead of straps. Bungee cords are easier to adjust, so you can ensure that the cover properly fits over the T-top.
Another crucial point when installing a T-top cover is to make sure it’s tight enough that it won’t flap in the wind while you’re out on the water. If there’s too much slack, this can cause undue wear and tear on both the canvas and frame components of your T-top cover. Furthermore, if there are any exposed areas around fittings or corners, then these should be covered with additional fabric or padding to prevent potential damage from rubbing or chafing.
Lastly, before setting off on a boating trip with a new T-top cover installed – do remember to conduct trial runs by taking short trips close by. This will allow you to check for any issues with stability or tightness before heading out into open waters where wind gusts could potentially damage your equipment. With these tips in mind, you’ll soon be able to confidently enjoy all the benefits of having a secured and durable T-top cover for years of trouble-free service!





1 comment
Fecha de pedido 7 may 2023
N.° de pedido 112-7268490-0481026
Total del pedido $90.25 (1 artículo)
cuando lo vi por primera vez, dudé de la calidad, pero no quise ser hacer perjuicios; efectivamente despues de 2 meses comenzo a perder color (decoloracion) y al tercer mes comenzo a rasgarse cerca de las costuras y en otras partes, no dura ni 3 meses, mucho menos 1 año, ni hablar de 3 años que cubre esta supuesta garantía. Este producto No es de grado marino como lo muestro en la fotografía con la cubierta del techo en color azul que si es de mejor calidad y mil veces más resistente al sol y la tensión .When I saw it for the first time, I doubted the quality, but I didn’t want to do any harm; Indeed, after 2 months it began to lose color (discoloration) and after the third month it began to tear near the seams and in other parts, it did not last even 3 months, much less 1 year, not to mention the 3 years that this supposed warranty covers. This product is not marine grade as I show it in the photograph with the roof cover in blue, but it is of better quality and a thousand times more resistant to the sun and stress
I WISH THE WARRANTY